Full Disclaimer: I actually recommend you don't do this. It's explained below, but in short snowboarding is an extreme sport, the jacket makes it more dangerous and Keir who wore it is a trained professional
I actually created this project a year ago, but silly me I lost the video along the way and I didn't want to publish this post without it. So it just took a little longer to get out 🙃
But here it is! Much better late than never, because it is totally rad and cool 🕶
This time last year, I was describing to my class some of the things I did in my previous role in R&D. The jacket you control with your mobile phone came up. I never really wanted to revisit the project if I'm honest, it involved native iOS apps, flaky bluetooth arduino boards and a cheap 'melty' jacket.
That was until one of my students showed me this video of a professionally made LED ski suit
I couldn't help it. The reason I had left my job was to make more things, so I did.
How to
Step 1: Get a jacket
This was relatively straight forward. Some eBay searching was all I needed. My only requirement was to not spend any money, as this was only an experiment. Second hand male medium jacket plus postage came in under £20, the only thing I may have over looked is I know nothing about male sizing. Medium for males is not average, that would be Large. (omg you are not your user!) Let's just hope it fits!
Step 2: LEDs
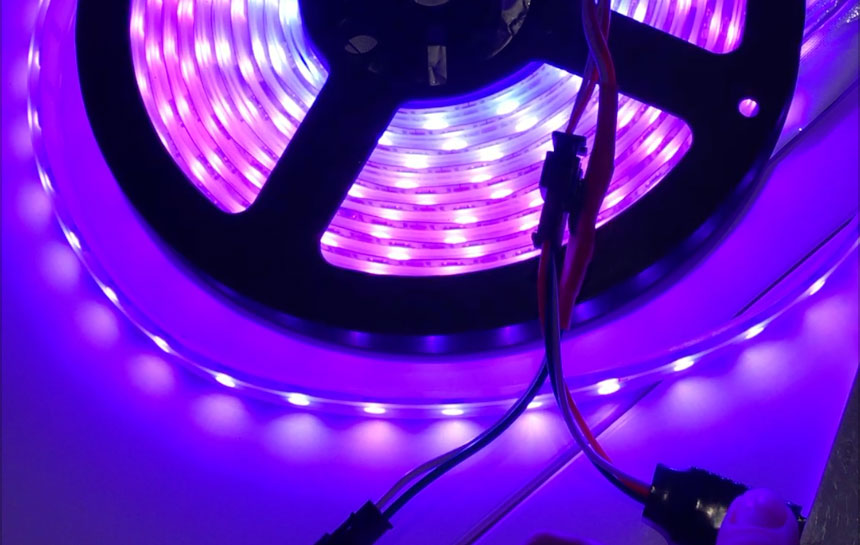
Now I needed a suitable LED strip - there are so many out there! Different amounts of LEDs, different power levels. I wanted it long enough and with loads of LEDs, and waterproof, and 5V so it could be battery powered. Not too many requirements then! Luckily Gordon, (who helped me loads with this project, thank you!), had pretty much ordered the same thing and so linked me up - phew! The item isn't available anymore but the description on eBay was "WS2812B 5M 5050 SMD Digital 300 LED Strip Light Addressable Color DC5V LE".
Step 3: Get the LEDs on the jacket
So I thought about this... a lot. My original plan was to weave them in a pattern around the jacket and arms and stitch them on, but once I had the jacket and LEDs I realised there wasn't enough length for this and to have them detachable from the jacket would be useful. I did have to fly with all the components, and a jacket with electrics attached to it doesn't really make for calm airport security 🤔
So I found some LED clips. The kind you nail to exteriors and thread the strip through. I ended up hand sewing 25 of these on the jacket where I wanted to string the strip around, to hold it in place. It meant Keir could put the jacket on and then we could weave the LEDs through these clips.
This worked with the length too as I could just circle the LEDs around the body, like an LED body warmer.
Step 4: Power
We used 4 mobile phone lithium ion 3v batteries. I could test the circuit with two quite happily. Batteries of this size are amazing, (and my best tip for wearables), light weight, rechargeable and pocketable.
Step 5: The circuit
The LEDs are controlled by an Espruino controller board. This is my controller board of choice as it has all the functionality you'd need from one, it's small (like really small) and you can run JavaScript on it, that's what it runs, no extra charge 👍🏻
Again a big thanks to Gordon here. We hooked up all the batteries together, added clips to them, the LED strip and a piece of extra wire that could be strung all the way down the back of the lining of the jacket, to connect the whole circuit together. From where the LED strip ended up at the top collar, all the way to the pocket where the batteries would be held.
This allowed really easy assembly when we went to put the jacket , everything could just be clipped together.
Step 6: Assembly
I had to take it apart to pack it for a trip to Andorra. This is where it would be worn. Props here to Rob for helping with my 'batteries through security anxiety'. The whole thing could be taken apart and then reassembled at the other end, so transporting it actually wasn't too difficult.
Wiring it whilst on however was another matter. Keir was the nominated snowboarder and a disclosure here: Keir is a qualified snowboard instructor - please please do not try this at home, it is actually quite dangerous. Not only is snowboarding an extreme sport (yes really), but I had to strap Keir into the jacket once the circuit was on, he could not easily get out.
As well as this, it wasn't until he had gone to do a run in the dark did we realise, he couldn't see. The glare from the LEDs was really strong. Now Keir knew where he was going and was familiar with the landscape, but like I said before please do not try this at home!
Anyhow, apart from all of this, Keir does look like a super hero (of sorts) and it was hilarious and loads of fun. Even just editing the video and looking back on it now I'm like, yeh we put LEDs on a snowboard jacket and took it up a mountain and then made a video and that was totally cool 🕶
Iterations
This was a proof of concept (POC). A POC is something you build to see if it will work, it's like a test iteration. You would do this before a minimal viable product (MVP) for instance. So my learnings moving forward would be thus:
- Hook up a mobile phone and use the data to send to the Espruino, so you could easily change light on movement for instance. When the phone accelerometer picks up on a sudden height change, the LEDs could get brighter, when the boarder rides left change the colour to blue and right to red. That would open up a whole heap of very cool possibilities.
- Get more LEDs
- Either use a wax covered strip, cos they are thinner and generally nicer... or
- Individually sew the LEDs on and cover the entire jacket with wax. There are a few reasons I didn't do this, cost is one, but I have used conductive thread before and it's not great, I would have had to use uncoated wire and time would have been longer as well
- Use one rechargeable battery pack: Replace all the phone batteries with a more easily rechargeable power pack. The mobile batteries were a good choice for this project because they are cheap and accessible.
- Consider tailoring the whole jacket, although to be honest it worked pretty well modifying an existing one. If budget wasn't an issue I would definitely consider a more integrated circuit to jacket, rather than just running it through the back lining.
- Find a way to stop the LED glare. Keir suggested an extendable collar, which is a great idea. Something the wearer could easily still see over, but stop the light coming from beneath.
This was such a fun and very crazy project to work on, thanks to everyone for their help, inspiration and making it happen!
It's ok I know what you're thinking and I'm already planning something audio reactive 🎶